Step 1: Get compute
Figure 42: Binder three ways, but note prerequisites below
Make your portfolio repository public at:
https://github.com/w201rdada/portfolio-MYUSERNAME/settings
If you wish, you may make it private again when you are finished pushing your website, but the binder service does not yet work for private repositories.If one doesn’t already exist, add a new text file to your repository by going to:
https://github.com/w201rdada/portfolio-MYUSERNAME/new/master
Name the fileDockerfile. Do not include.txtor any other extension.
Paste the following (or raw) text into the file and commit the newDockerfilefile to your remote:FROM w201rdada/portfolio:fa17 USER root COPY . /home/rstudio/ RUN chown -R rstudio:rstudio * .* USER rstudioThe first line of the file defines what software image will run under your code, and the rest copies your repo data into the image. The image called
w201rdada/portfolio:fa17is based on images published by Rocker (R + Docker).Launch an RStudio Server instance in one of three ways:
Open our binderhub portal at: http://hub.w201rdada.org
Pastehttps://github.com/w201rdada/portfolio-MYUSERNAMEas the GitHub repo or URL.
To the right of the Path to a notebook file (Optional) field, changeFiletoURL.
Enterrstudiowhere it says URL to open (optional).
Press Launch, and wait for your image to build.
Click the binder badge bar for a nifty push-button markdown snippet to add to your repoREADME.md!Alternatively, simply point a browser to:
http://hub.w201rdada.org/v2/gh/w201rdada/portfolio-MYUSERNAME/master?urlpath=rstudioAlternatively, if you press Launch without adding
rstudioto the URL field, no worries! You’ll see a JupyterHub with your files. You can select RStudio Server from the New menu as documented here.
Now you should have a browser window with an active Rstudio Server instance (running for free on Google Cloud!). Read below for details about your instance.
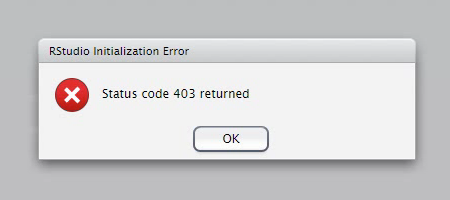
Figure 43: To fix this 403, reload your browser.
You’re ready for Step 2: Update your repo!
Features of your Binder Pod
It ain’t beefy, and you only have 1GB of RAM, so good luck installing TensorFlow. If you happen to ask for a seat when a node is already full, your binder may time out waiting for a new node to be provisioned on the cluster. Wait a minute and try again. If your binder never seems to launch, post on Slack! Please do not keep launching pods willy nilly if your first few attempts fail; they may well be scheduled and fill up all seats on the cluster.
Your instance (actually a kubernetes pod) is ephemeral. Your pod will expire after 30 minutes if you leave it idle or close the browser window. Don’t worry, you can get another (different) pod as above. You may save your unique RStudio Server URL to return to your (same) pod before it expires. For example, your ephemeral pod URL may look something like this:
https://pod.w201rdada.org/user/w201rdada-portf-o-MYUSERNAME-42vvqlvi/rstudio/?token=cjZbqrH0RfKLEelECBb86QIt’s free for you, but each binder pod costs one of a limited number of seats on the cluster. If you launch several pods (you can tell because each will have a unique URL) then other students may have to wait for your extras to expire. So, please, one-at-a-time! If you open several pods (RStudio Server windows) by accident, or if you can’t get on the cluster, ping Slack so your instructor can manually prune pods.
When the instance expires after 30 minutes, so do your data. To save your data you must use git to push to your remote (see Step 2). So, commit early, commit often!, or better:
git add .
git commit -m "hi i'm a commit message"
git push origin master
Alternatively do all your editing on GitHub.com, then pull changes to the instance. Changes committed on the instance that are not then pushed will be lost. Lost data will be a bitter reminder of good cloud computing habits.
Check out the video below to learn a little about the tech underlying our Binder cluster.
Figure 44: Binder is based on dap Kubernetes and Docker snazz